Do you have new plaster in your home and want to know the best way to paint it?
Painting on fresh plaster walls can be tricky, so knowing the proper technique can mean the difference between success and failure.
Do it the right the first time by following this step-by-step guide. We’ll explain what to do before you start, and then the exact steps on how to paint on new plaster and have it look amazing!
Before You Start
CAUTION! – Never attempt to paint over new plaster before it has fully dried.
There are various ways to plaster walls, including plasterboard or backing plaster, which take different amounts of time to dry.
Plasterboard dries faster, usually within 3-4 days, while backing plaster on walls or ceilings takes anywhere from 5-7 days.
Experts suggest always erring on the side of caution when dealing with plaster surfaces, opting to wait seven to ten days for thorough dry time.
Another indication a plastering job is ready for paint is the overall color. The entire surface needs to be uniform and light in color, with no dark patches that mean moisture is still lurking inside the plaster.
Once you are confident the plaster is completely dry, you’re ready to start painting.
Plaster Painting Supplies
- Bucket
- Plastic sheeting
- Paintbrush and roller
- Paint/roller tray
- Painters tape
- Rags
- Stir sticks
- Base or sealing paint (mist coat)
- Finish (topcoat) paint
- Water
- Ladder or stepstool
Now that everything is prepared, you can follow these steps to a flawless paint job.
Step 1: Cover and Prep
Spread out plastic sheeting over any floors and furniture you wish to protect from paint splatter.
Use painters tape along the edges of doors, window framing, baseboards, and crown molding to keep them clean.
Set up a staging area over a section of plastic to hold your paint cans, mist coat, roller tray, brushes, and other accessories.
Have a ladder or step stool handy to reach the upper portions of walls or the ceiling that needs painting.
Step 2: Create a Mist Coat
The first step in painting fresh plaster is to seal the surface. Plaster is very porous and dry, which will suck up standard paint if you directly apply it. The result will be uneven color, patchiness, and eventual peeling paint.
Avoid those issues by creating a “mist coat” or sealant for the bare plaster so that the topcoat will adhere evenly and adequately for a long-lasting, smooth finish.
DIY Mist Coat Directions
If you want to lower your painting budget, a DIY mist coat is easy to make, even if it sounds complicated. The formula is just a mix of water-based paint and plain water that helps soak deep into the plaster and seal the surface.
The ratio should be four parts paint, to two parts water. Mix this in the bucket to allow for stirring space.
Some paint brands are thicker than others, so adjust the ratio slightly to achieve a well-diluted, watery emulsion. Keep mixing until there is no separation between the water and paint.
Most homeowners choose to use the same paint they plan to finish coat with, but it is not necessary. It is smart to use a light color similar in shade to the final coat, so the finish appears more even.
Do not use a vinyl-base paint nor a PVA glue sealant as a base or mist coat, as both create a barrier that prevents the finish coat from adhering to the plaster. When the paint sits “on top” of this type of barrier, it will bubble, chip, and peel off in short order, which ends up wasting your time and money.
NOTE: You can purchase pre-mixed plaster mist coat emulsions in cans at local home improvement stores if you’d rather skip the DIY, and don’t mind spending the extra money.
Step 3: Apply Mist Coat
Roll or brush on the mist coat, moving carefully to avoid drips and splashes of the watery paint mixture.
Take your time with this step, since it’s crucial to pause often to roll out, rag off, or brush out areas where the mist coat runs or drips. An even application will provide the best seal and help the topcoats appear more smooth.
Stir the mist coat often to retain a good paint and water blend.
Expect the plaster to absorb the mist coat quickly, but don’t keep rolling over the same spot. Apply one even layer over the entire surface and allow it to air dry for 24 hours.
Don’t try to accelerate drying time by using fans or a dehumidifier. Both methods can cause hairline cracks in the plaster, which will be troublesome to hide later.
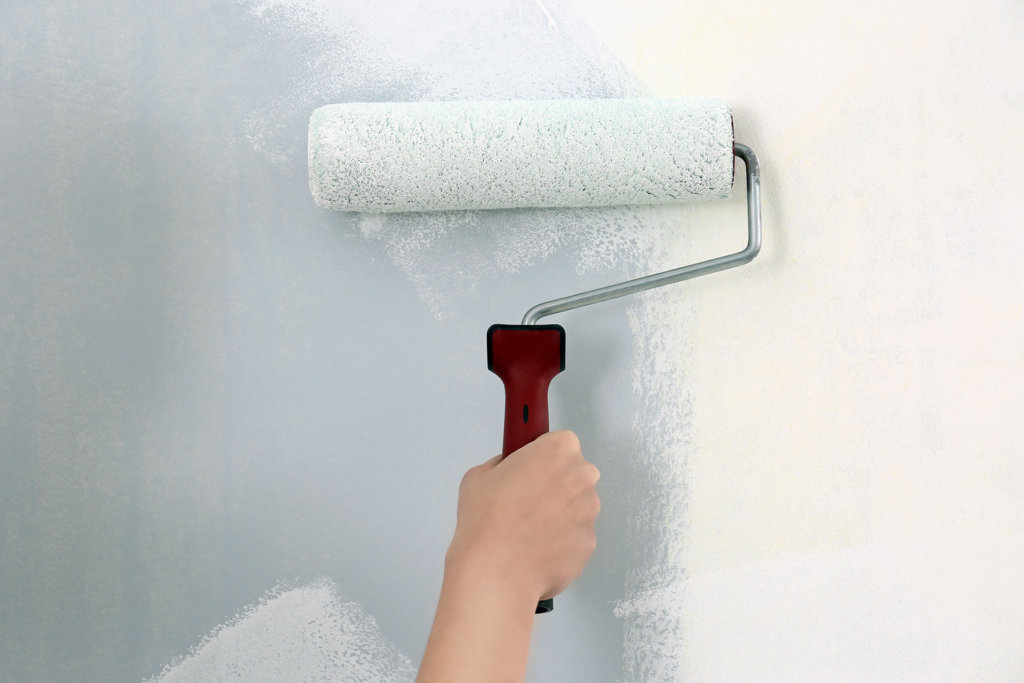
Step 4: Apply the First Finish Coat
Stir up your topcoat paint and apply an even layer over your plaster walls or ceilings. You can use a roller for fast coverage of large open areas and a brush for working around areas of detail.
You can also go with a paint sprayer (with proper protection of your household items) if you have lots of square footage to tackle.
Apply the paint in a W-shape pattern, making sure it spreads out in a thin, even layer before loading the roller or brush with more product. Let the first coat dry a minimum of six hours, but it’s best to wait a full 24 hours if you can spare the time.
How to Paint Exterior New Plaster
Sometimes new plaster is on the exterior of your home. Painting new exterior plaster is much less complicated as it requires no mist coat after the bare plaster is dry.
Select high-quality exterior masonry paint in the color of your choice and roll or brush on a thin, even layer. Once the first coat dries, apply one more coat for additional durability.
Step 5: Apply the Final Topcoat
Even if the first finish coat of paint on your new plaster looks flawless, go ahead and apply a second coat.
Two coats of finish paint will increase the richness of the color, enhance the sheen, and protect the surface better from scratches and dings. Use the same W-shape motion while rolling or brushing and watch out for drips that can ruin the final look.
Let dry, remove any painters tape, stand back, and admire your work!